As we all know Tally has launched a new version of its software on 9 November 2020, but this time it’s not a release change. It’s a completely different software, which works similarly to Tally ERP 9 but is more efficient and full of features. So here I am guiding you about the Tally Prime Installation, Upgradations and Activation.
As it’s a completely new software, it can run standalone. It has no dependency on its previous version Tally ERP 9.
I know you have so many questions about this Tally Prime like,
If you already have a valid Tally ERP 9 license then how to activate it for Tally Prime?
If you are a student and want to activate its Education version or you want to try Tally Prime before purchasing it.
We are going to cover all these here. Even if you want to run both versions simultaneously then we are going to help you.
If you are new to Tally Prime, then I strongly recommend you to visit our detailed article about Tally Prime’s new features and differences from Tally ERP 9.
Table of Contents
Tally Prime Download
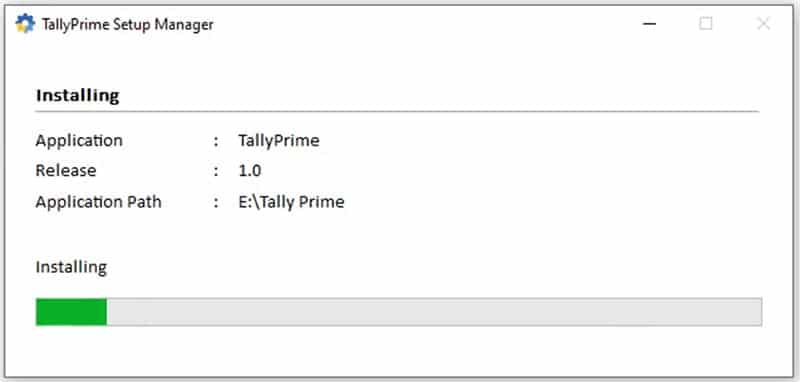
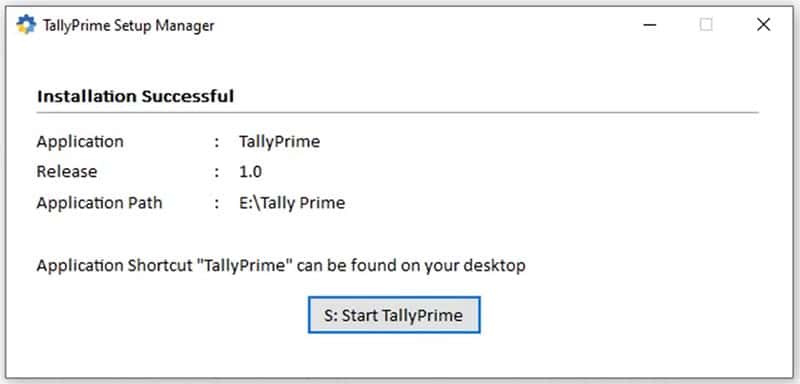
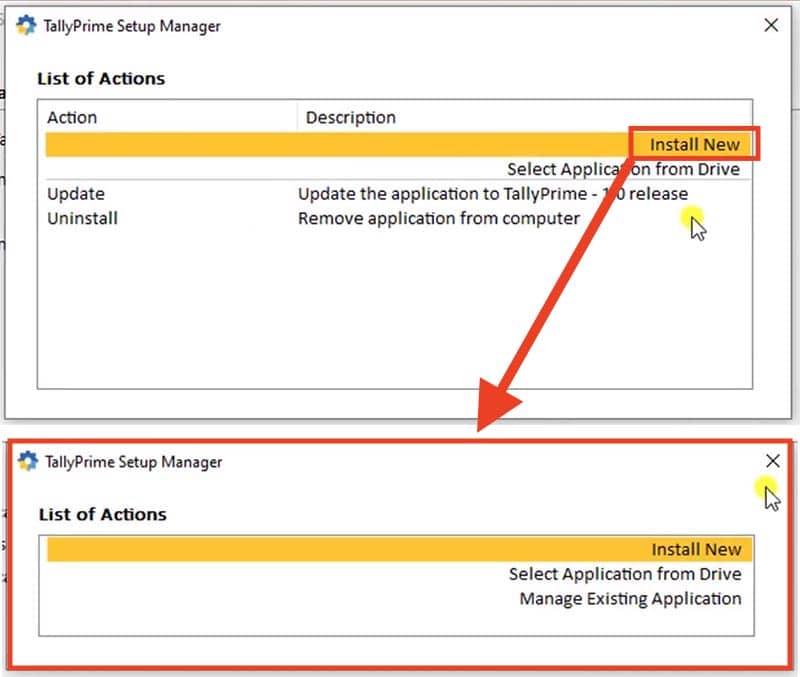
Tally Prime Installation
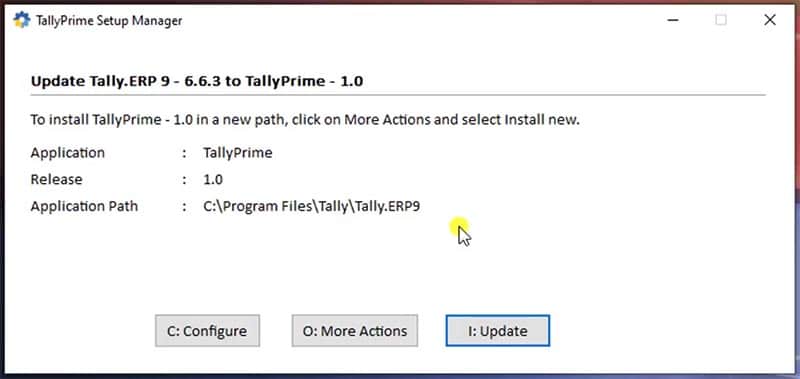
Update Tally ERP 9 to Tally Prime
Tally Prime Fresh Installation
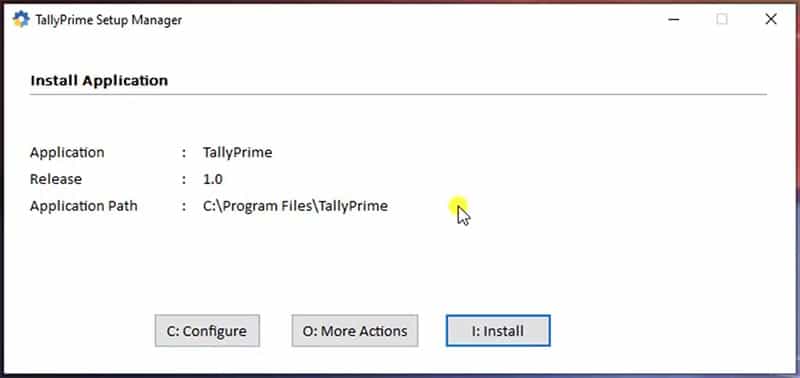
How to change Installation Path
Now set whatever path you want then click OK.
Tally Prime Activation
- T: Continue In Education Mode
- U: Use license From Network
- R: Reactivate Existing License
- A: Active New License

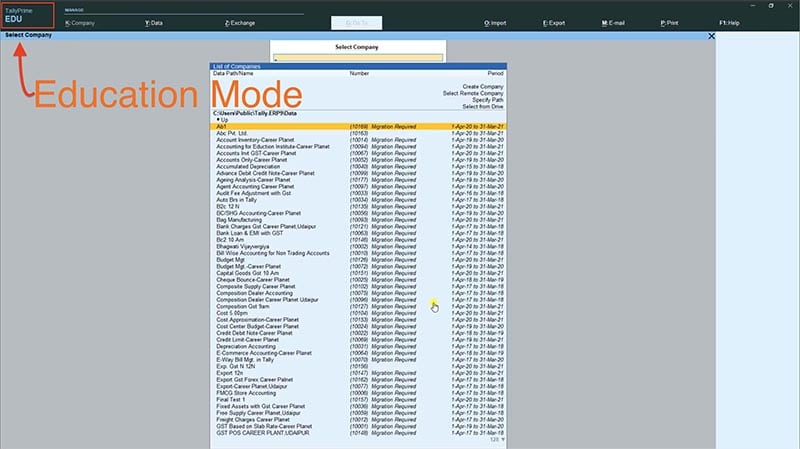
Tally Prime Education Mode Activation
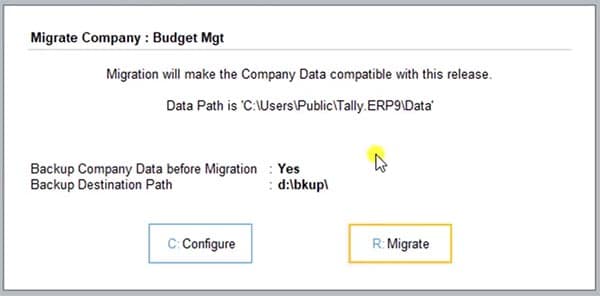
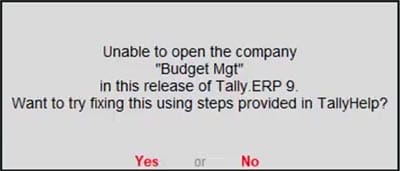
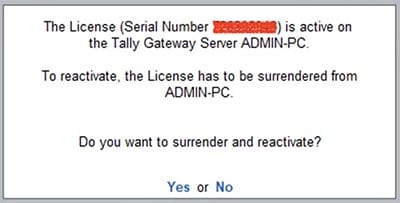
Tally Prime Upgrade from Tally ERP 9

After activation, you can cross verify it by the logo of Tally Prime. It will show whether your license is SILVER or GOLD like this.
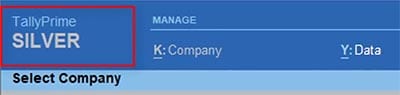
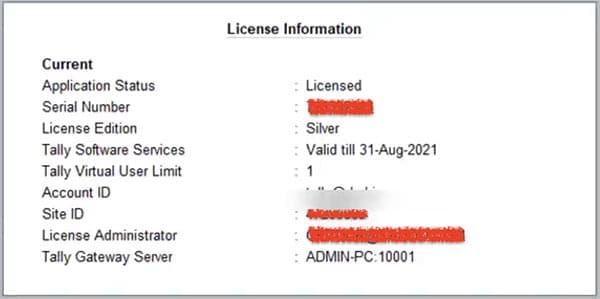
If you want more information about your license then you can click on the logo and get details like this.

Conclusion
Tally Prime is a new software that works similar to Tally ERP 9 and the same license can be migrated to Tally Prime.
It’s easy to install and upgrade, but don’t upgrade it before knowing about Tally Prime, because if you want to return back to Tally ERP 9 after moving Tally Prime, you have to again migrate your license from Prime to ERP 9.
Rest core features are mostly same as ERP 9, even Education mode is exactly the same.